Egg Farmer Scott shows how to make an omelette
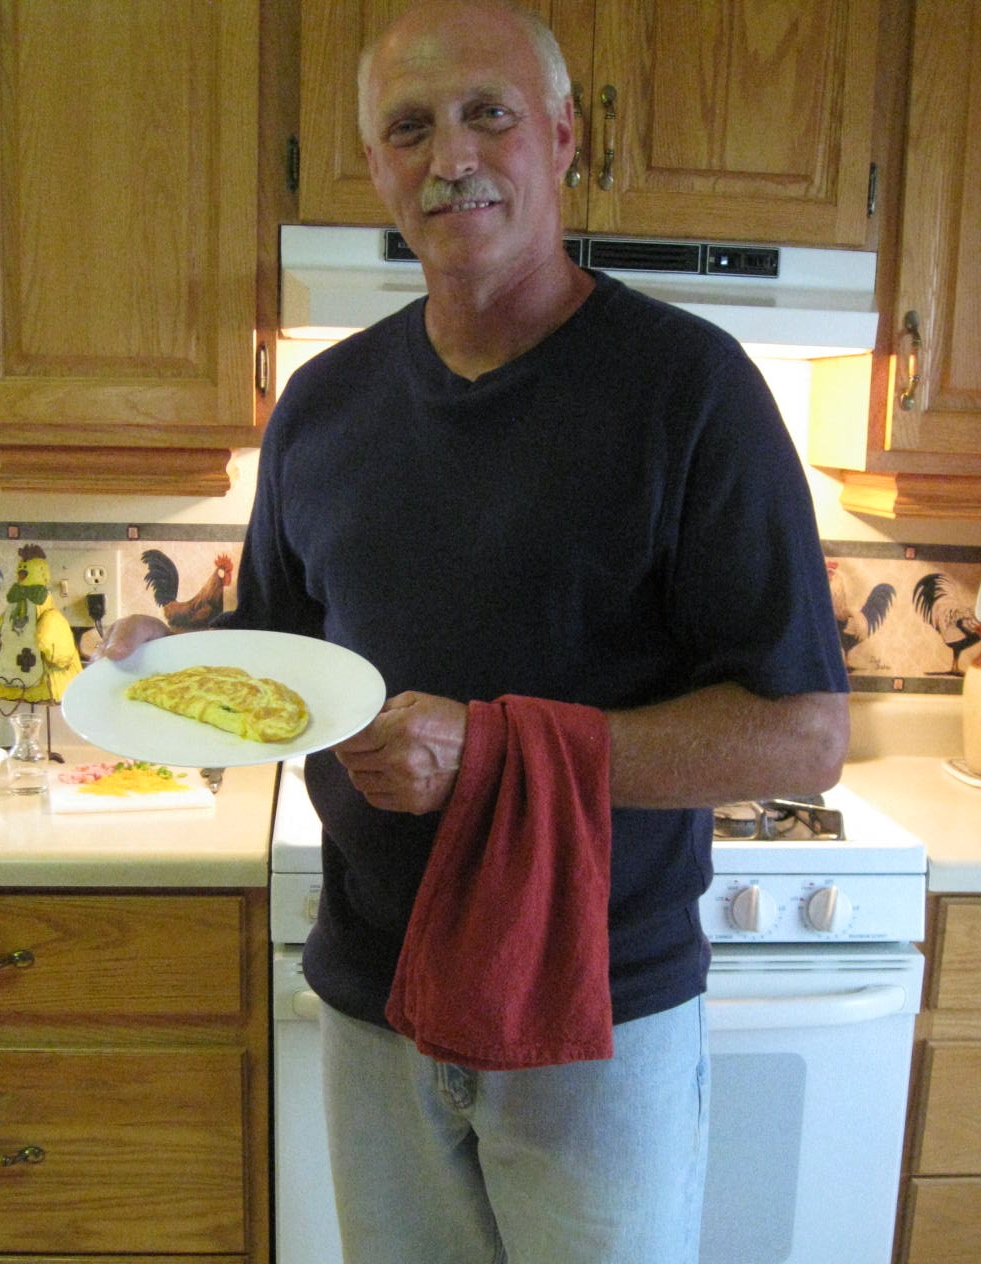 I'd like to introduce you to Scott Graham. He's an egg farmer in St. Marys, Ontario. He's also one of the farmers in our Who Made Your Eggs Today? campaign, and one of the faces on billboards around Ontario profiling some of our farmers. I live in Kitchener. It's not far from St. Marys so Scott's face is on billboards in my area. There's a good chance I'm buying eggs from Scott's farm when I purchase eggs at my local grocery store.
You can learn more about Scott and his family by visiting his page on our Egg Farmers of Ontario website. There you can also watch Scott demonstrate how to make an omelette.
Omelettes - Not as difficult to make as they're cracked up to be!
I often hear people lamenting about the trouble they have making omelettes. Either the omelette ends up as scrambled eggs or it cracks when it's folded over, which although not the worst that could happen, isn't the look you had in mind. Trying to flip the omelette to cook the other side is just a recipe for disaster and usually leads to a split, cracked or dropped omelette! With all those issues, no wonder omelettes are sometimes considered just a little troublesome! I think knowing how to make an omelette is a skill everyone should learn.
If you can cook an omelette, it means that, provided you have eggs in the fridge along with a bit of cheese or some leftovers or other filling ingredients, you'll always be able to make a meal for yourself - and mighty quickly too! Sure, omelette-making can be a little tricky. You just have to know the tricks!
These tips will help you turn out a picture-perfect omelette, if not the first time 'round, then at least after a bit of practice! Don't be put off because there's lots to read below. None of it is complicated. I'm just a little wordy! And want to give you as many tips as I could think of.
Maybe you even have more to add?
Tips for making omelettes:
- For a 2 or 3-egg omelette, use an 8-inch (20 cm) frying pan or skillet. Small omelettes of this size are easier to make than large omelettes. And they tend to be fluffier and easier to handle.
- You can add whatever liquid you like to the beaten eggs (e.g. water, milk, juice, broth, etc.) but water is recommended as it will turn to steam making a light, airy omelette. Use a tablespoon or two (15 to 30 mL) for a 2 to 3-egg omelette.
- The pan should be hot when the eggs are poured into it. You should hear a lovely sizzle as the eggs hit the hot pan.
- A hot pan means the eggs will start to cook immediately. Use your flipper or a spatula to gently push the cooked portion of the egg toward the centre of the pan while tilting the pan to allow the uncooked portion to flow into the empty spaces (as soon as it hits the hot pan, the egg will begin to cook). Repeat the procedure - gently pushing and tilting - until the omelette is almost cooked on top. You don't want a mountain of eggs in the middle of the pan so flatten things out a little if necessary as you proceed, or poke some small holes in the cooked parts of the egg with a tip of the flipper to let some of the liquid egg run through to the bottom of the pan to cook. Don't stir; use gentle pushing and tilting motions. But keep in mind that it doesn't matter if the omelette looks a little lumpy or not completely lovely on top. It will be covered with filling and well hidden once the omelette is folded over.
- There's no need to flip the omelette over to cook the top. For most of us, attempting to flip the omelette would just be asking for trouble! If you cook the omelette by the push and tilt method described above, most of it will be cooked by the time you add the filling. And by the time you add the filling, fold the unfilled side over and let the omelette sit in the pan briefly to melt any cheese, the eggs will have cooked through completely.
- All filling ingredients should be prepped and ready to use before you start to cook the omelette. If you prefer that some of the ingredients are cooked (e.g. onions, peppers, mushrooms), do so ahead and then remove them from the pan. Or, cook the ingredients, leave them in the pan and pour the eggs over top. The ingredients will then cook into the eggs. If you want a more traditional filling but don't want to precook any ingredients, cut them finely so their texture is not so crunchy. Then as soon as the omelette appears mostly cooked, spread the filling across one side of the omelette. Put your flipper or spatula under the unfilled side, lift it up and fold it over the filled side.
- To remove the omelette from the pan, stand the edge of the pan on top of the plate slightly angled back. Turn the pan over quickly so the omelette falls out onto the plate with the bottom of the omelette facing up.
There you have it. You've made an omelette! Have you got any omelette-making tips to add?