Top 10 Tips for Easter Egg Decorating
Easter is right around the corner once again and if you're looking to change up your usual preparations, we've got some ideas for you. These 10 tips are meant to fuel your egg decorating creativity. Here are some fun suggestions - you take it from here! Happy decorating!
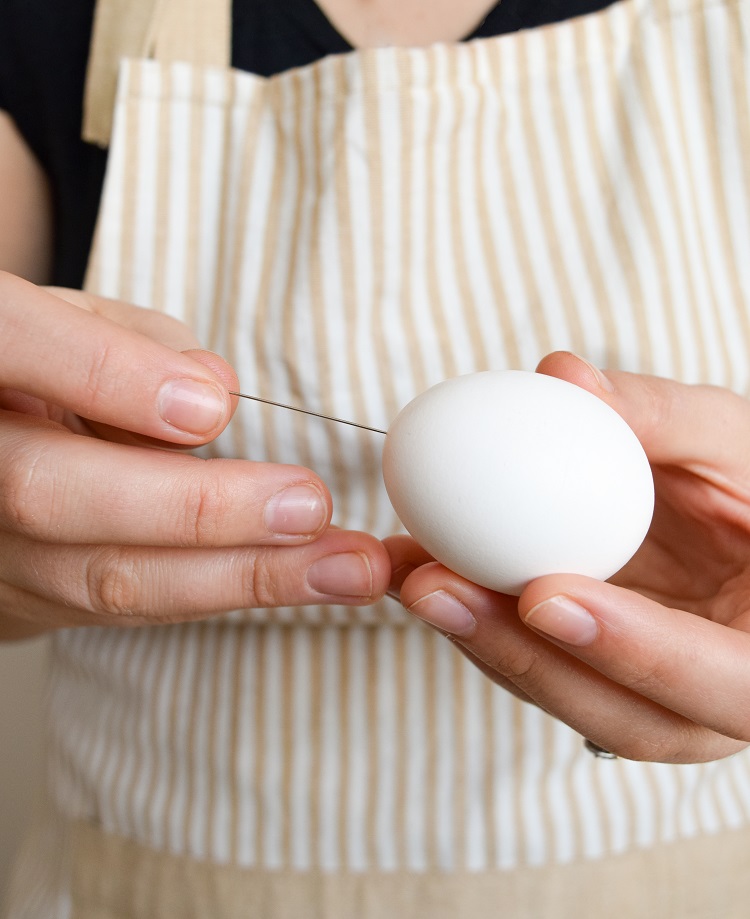
Tip 1 - Blow Out Your Eggs
We recommend this first in the process because we're certain you'll be creating beautiful eggs that you'll want to keep for longer than just a few days! By blowing out the contents of your eggs, you can keep your beautiful creations for years to come. Not sure how to do it? Check out this super easy tutorial.
Make sure you keep the contents of your eggs for a delicious frittata or decadent brownies. This Easter Paska is also a traditional favourite. You can cook up a tasty storm! Browse through our recipes for even more ideas.
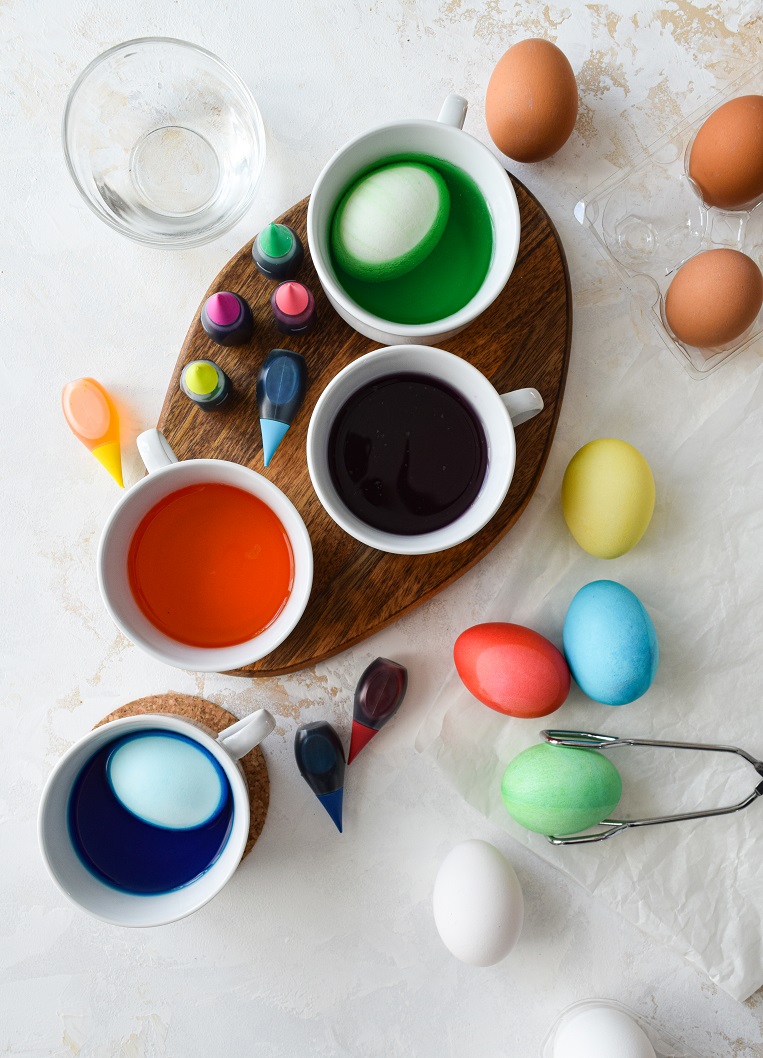
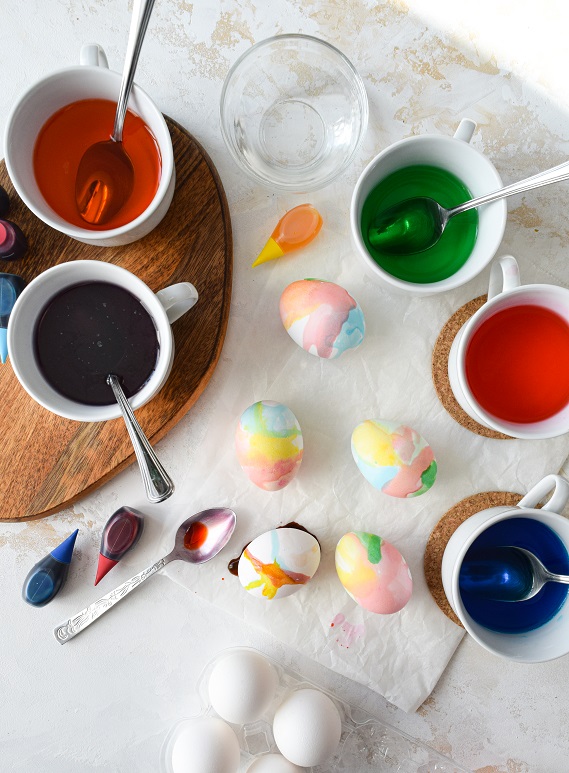
Tip 2 - Dye ‘Em with Pantry Items
This time of year it's not hard to come across egg dyeing kits at the stores, but using things you've already got in the pantry could save you a trip and an expense. All you need to do is mix three simple ingredients. For every 1 cup of warm water, add 1 tbsp of vinegar and as many drops of food colouring as you like (depending on the colour intensity you wish to achieve).
Beets, spinach, blueberries and turmeric can also deliver wonderful results. Detailed instructions are provided by our friends at Produce Made Simple.
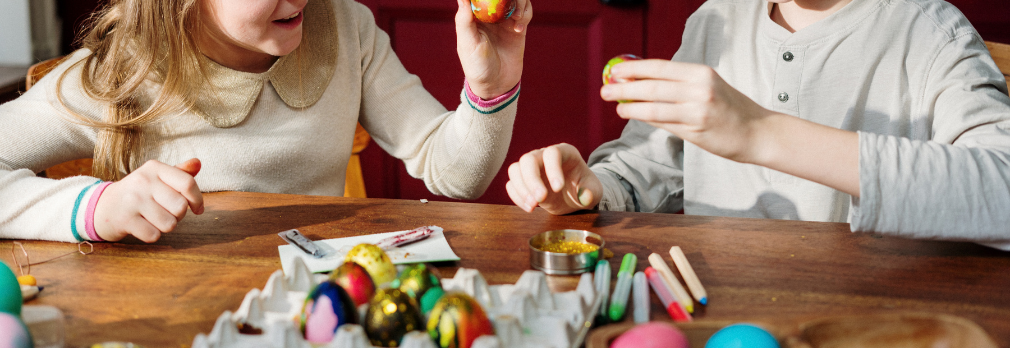
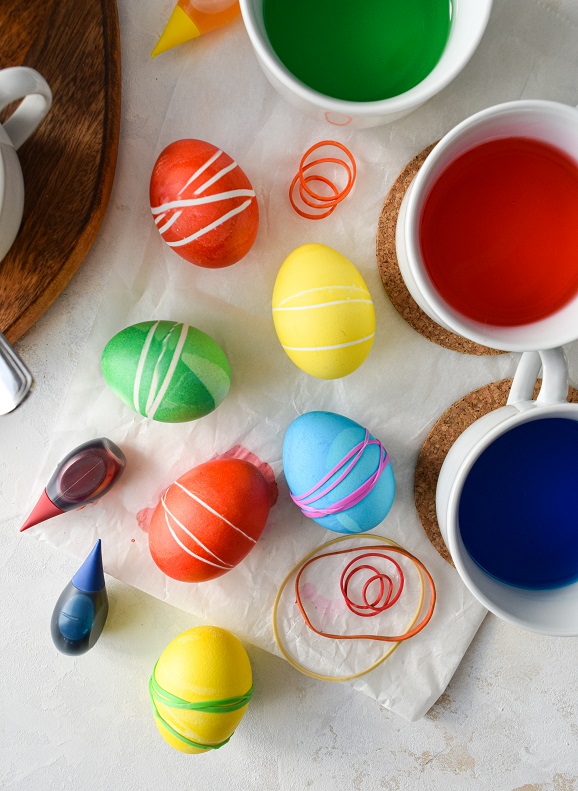
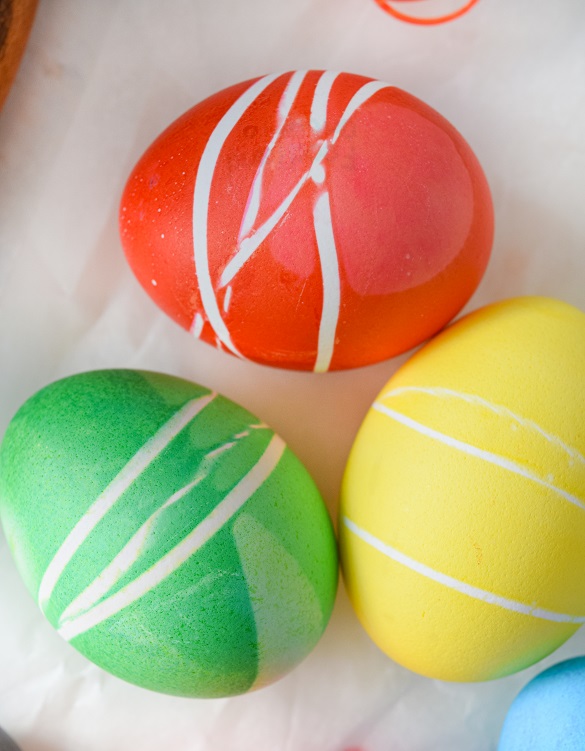
Tip 3 - Use rubber bands
Before dipping your eggs into a dye, wrap some of them in rubber bands. They'll result in fun stripes that allow the original egg colour to shine through. It's an added visual layer to your colourful design.
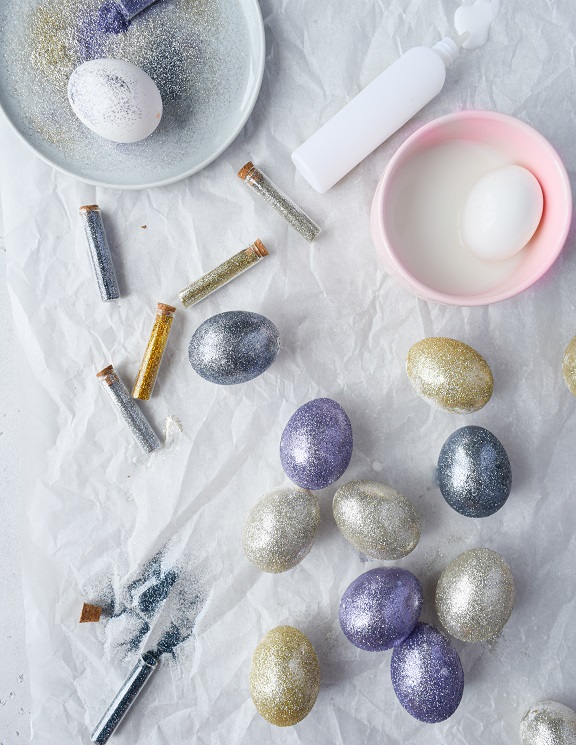
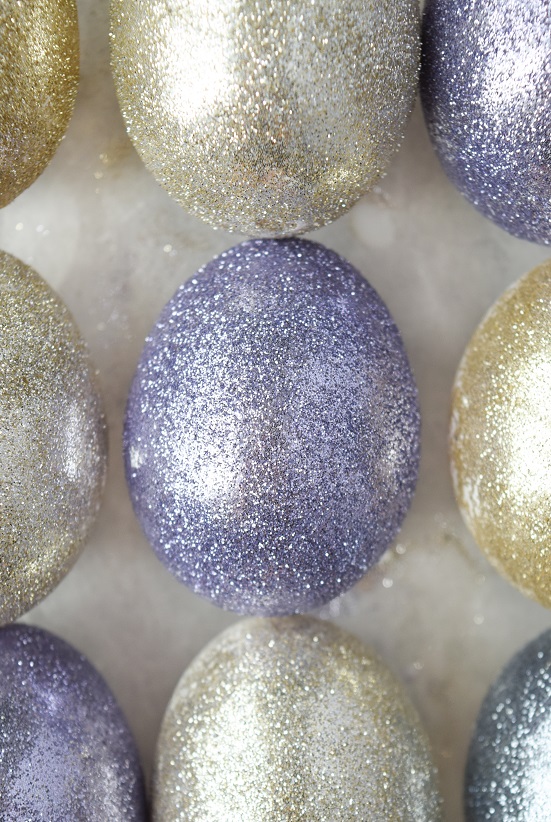
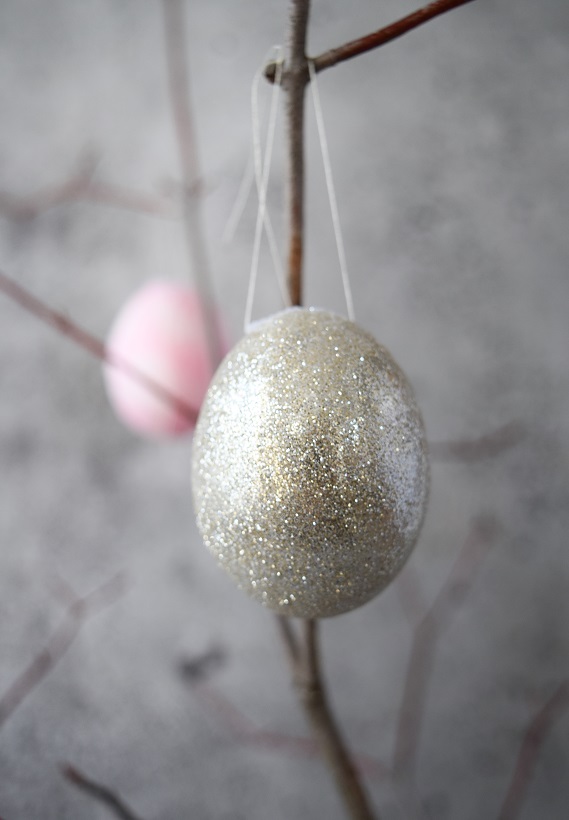
Tip 4 - Make disco eggs
Oh yes, we went all out with the glitter for these ones! You can get wacky with brightly coloured shades of glitter or use muted tones for a more elegant look. Either way, they're plenty of fun to both make and look at!
Here's all it takes to make them. Mix equal parts liquid glue with water. Roll your egg around in the mixture until you've achieved full coverage. Over a separate plate, sprinkle glitter over the egg and allow to dry for a couple of hours.
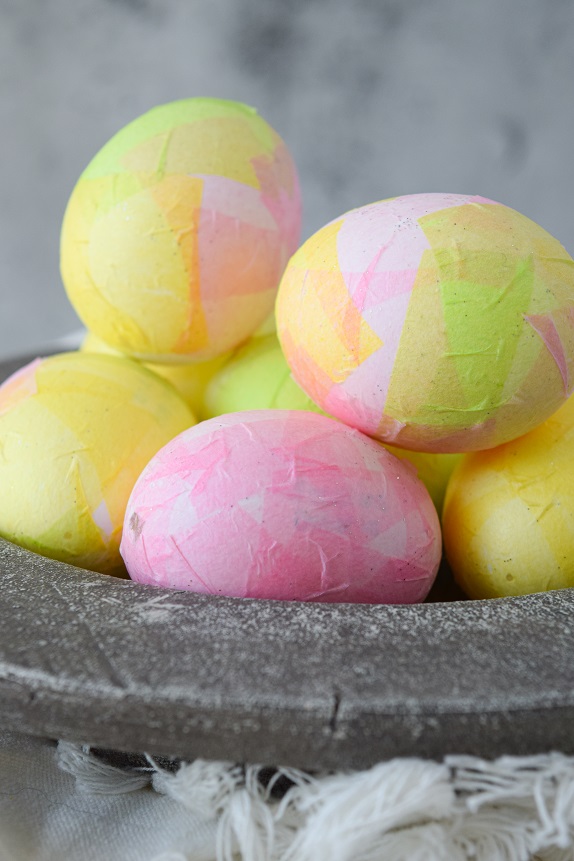
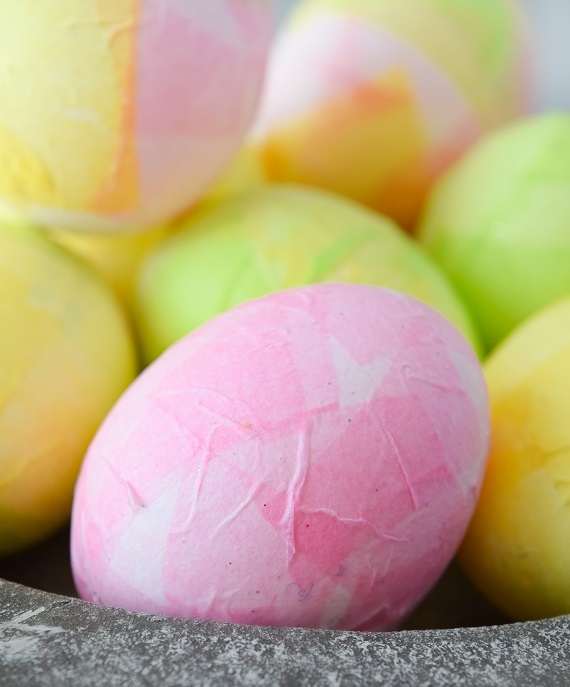
Tip 5 - Cover them in paper maché
This is especially great to do with blown eggs because a coat of hardened paper adds a layer of strength to the naturally fragile eggshell.
Here's where it gets fun - use tissue paper! It conveniently comes in bright colours and patterns that often remind us of spring. Dip 1 inch pieces of tissue paper into a mixture of equal parts water and liquid glue. Paste the pieces onto the eggshell and smooth over with a paintbrush or (if you're willing to get messy) your fingers. Allow to dry overnight.
Tip 6 - Tye dye eggs
If one colour on your eggs isn't enough we won’t judge! It's plenty of fun to dress your eggs in a rainbow of hues. Tye dye is a great way to do it. Pick your favourite dye colours from Tip 2 and using a spoon, gently pour them over each egg. Make sure to start with the lightest colours first and use darker ones as you go.
You can let the eggs dry between adding colours for more solid colour differentiation or you can pour them all on within minutes to swirl them into a colour gradient.

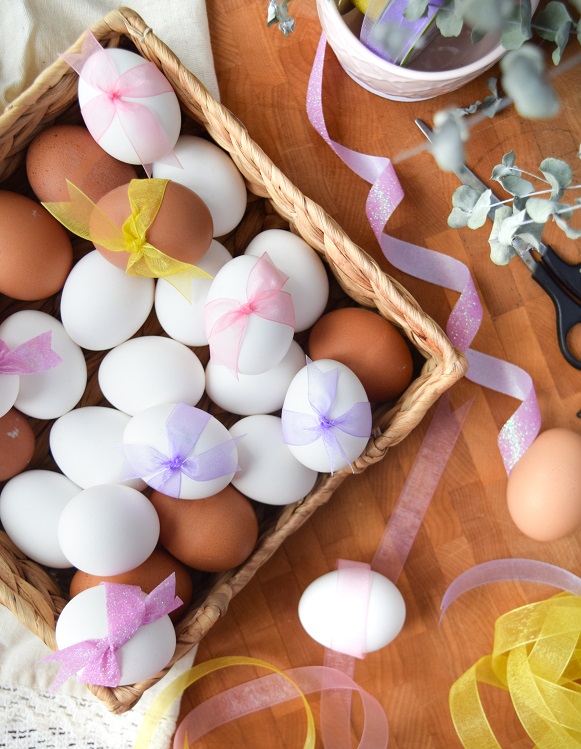
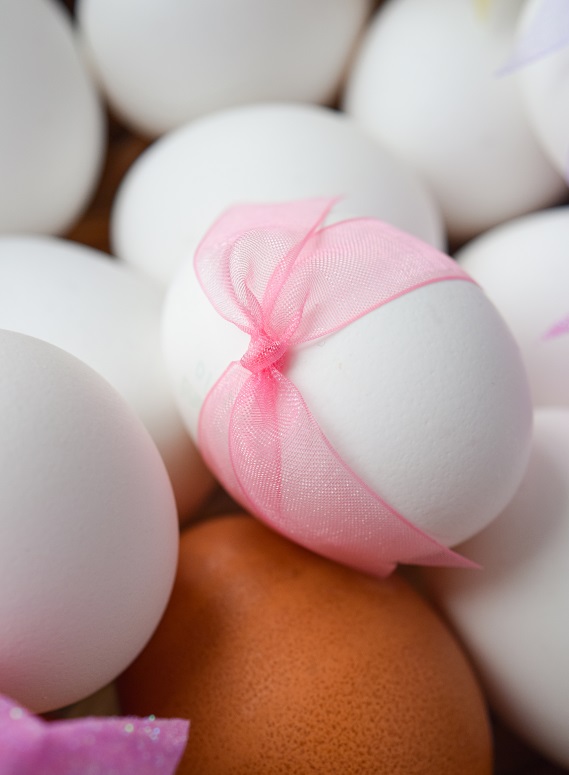
Tip 7 - The simplicity of ribbons
Ribbons are a wonderful way to decorate your eggs when you're in a time crunch. But don't let that fool you - ribbon eggs still look stunning when completed! This is certainly an elegant touch to any Easter decor. In fact, you can tuck a name tag under each ribbon and use them as place cards around the Easter dining table.
Tip 8 - Stickers
This design is especially fun when you're decorating with very young children. You can use Easter themed stickers or any other ones you might have on hand. We experimented with textured stickers! It adds a 3D element to the shell of our Easter eggs.

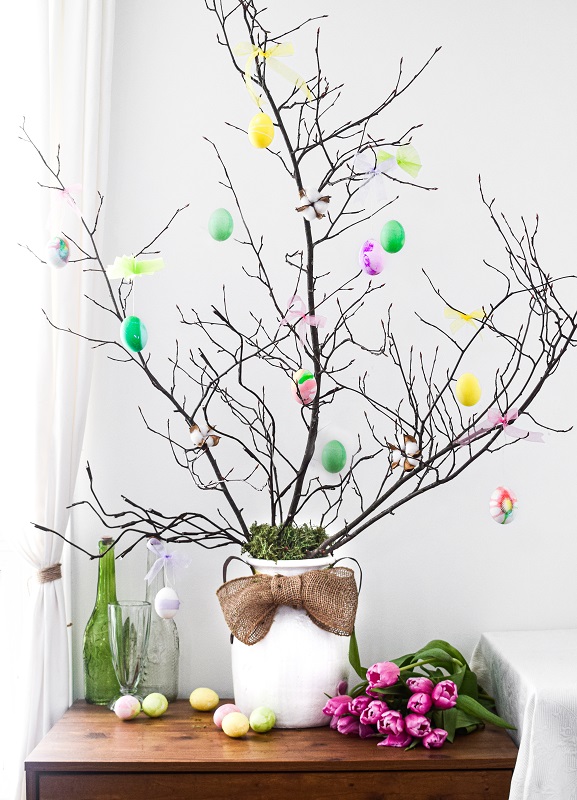
Tip 9 - Hang them up as decoration
Whether it's in your window or on a festive Easter tree, thread your eggs and hang them up for the world to see!
Tip 10 - Display them in a designer carton
Here's where you can really let your creativity soar. Think of your egg cartons as an empty canvas! Paint them in Easter colours or even recreate an entire spring scene. You can even fill the wells with Easter grass. You've worked this hard on these Easter eggs, it's time to put them on display!

So there you have it. Our favourite tips to design a gorgeous set of Easter eggs!
Don't forget to share all of your fun Easter egg decorations with us! We love to see what you come up with. Connect with us on social media:
- Instagram: @eggfarmersont
- Facebook: Egg Farmers of Ontario
Twitter: @GetCracking
Now Get Cracking!
FAQ
Do I boil eggs before decorating them?
The need to boil your Easter eggs before decorating depends on the decorating technique you choose and how long you’d like your eggs to last.
If you plan to use non-food-safe materials for decorating, or would like your decorated eggs to last for weeks or even years without spoiling, it's better to blow out the eggs rather than boil them. Blowing out eggs involves poking a hole on both ends of the egg and blowing into the egg with a straw until the egg whites and yolk drip out. This is a great way to empty the egg without damaging the shell.
On the other hand, if you're using food-safe or natural materials to decorate the eggs and would like to eat them shortly after dyeing, you can boil the eggs. In that case, the decorating method will determine when to boil the eggs. For instance, this natural egg dyeing technique requires you to dye the eggs by boiling them for 30 minutes. If you are using a decorating technique that doesn’t involve the eggs being cooked further, boiling the eggs before decorating is encouraged.
How to decorate fancy Easter eggs?
For a fancy and sophisticated look, explore the decorating ideas mentioned above! Here are some techniques we particularly adore:
- Disco Eggs
- Paper Maché Eggs
- Tye Dye Eggs
- Ribbons
If you've chosen to blow out your eggs, we highly recommend displaying them in a vase filled with trimmed branches from outdoor trees. This creates an elegant centerpiece that beautifully showcases the creativity and artistry of your Easter eggs.
How long do you boil eggs before colouring?
If your egg decorating technique calls for pre-boiled eggs, it is best to use hard-boiled eggs rather than soft or medium cooked eggs. Hard boiling your Easter eggs will create a firm base for your design and keep your eggs safe to eat for longer.
Hard boiling eggs can take 10-14 minutes. Here is a step by step guide on how to hard boil (hard-cook) eggs.
How do you make the most vibrant Easter eggs?
Making vibrant Easter eggs involves a combination of techniques and materials. Here's a step-by-step guide to help you achieve the most vibrant Easter eggs:
What you'll need
- Hard-boiled eggs (cooled to room temperature)
- White vinegar
- Food colouring or Easter egg dye tablets
- Bowls or cups (one for each colour)
- Spoons or tongs for dipping
- Paper towels or egg cartons for drying
- Optional: stickers, rubber bands, crayons, or wax pencils for creating patterns and designs
Instructions
- In separate bowls or cups, mix water, a few tablespoons of white vinegar, and your choice of food colouring or Easter egg dye tablets.
- Before dyeing, get creative by adding patterns or designs on the eggs. Try some of the tips above, like using stickers, rubber bands, crayons, or wax pencils to draw or create designs. The dye won't penetrate these areas, resulting in unique patterns.
- Carefully lower the eggs into the dye one by one. You can use spoons or tongs to avoid any accidental breakage. Leave the eggs in the dye until you achieve the desired colour intensity.
- Once you're satisfied with the colours, place the eggs on paper towels or in egg cartons to dry completely. Be cautious not to smudge the colours while they dry.
- If you want to give your eggs an extra shine, you can apply a thin layer of vegetable oil using a paper towel. This will make the colours pop even more.
Tips
- Vinegar helps the food colouring adhere to the eggshells, resulting in a more vibrant colour.
- The longer you leave your eggs in the food colouring solution, the more vibrant the finished colour will be.
- If you plan to keep your dyed eggs for decoration, consider blowing out the egg contents first and rinsing the inside. This will prevent the eggs from spoiling over time.
Is it better to dye eggs hot or cold?
It is best to dye eggs when they are either room temperature or cold. There are a few reasons for this.
Even Colouring
When eggs are hot, the dye may cause the eggshell to develop uneven colours. The heat can cause the dye to set too quickly, leading to patchy or streaky results.
Reduced Risk of Cracking
Placing hot eggs into a cold dye bath can cause the eggs to crack due to the sudden change in temperature. Starting with cold eggs reduces this risk.
Safety
Handling hot eggs can be dangerous, especially if you're involving children in the process. Using cold or room temperature eggs makes the dyeing process safer and more enjoyable for everyone.
What should I stuff my Easter eggs with?
Stuffing Easter eggs is a fun tradition, especially for Easter egg hunts or as little surprises for friends and family. Here are some ideas for what you can stuff inside plastic Easter eggs.
- Candy: This is a classic and popular choice. You can use small chocolates, jellybeans, gummy candies, or any other bite-sized sweets that fit inside the eggs.
- Mini Toys: Small toys or trinkets can be a hit with kids. Look for mini action figures, rubber ducks, bouncy balls, toy cars, or other small toys that fit the egg's size.
- Stickers: Kids love stickers, and they fit perfectly inside Easter eggs. Look for Easter-themed stickers or ones featuring their favourite characters.
- Coins: Depending on the age group, you could include some coins or bills for older kids or as a fun way to save money.
- Temporary Tattoos: Kids enjoy temporary tattoos, and you can find various Easter-themed designs or characters.
- Hair Accessories: For girls, you can include hair clips, hair ties, or barrettes.
- Small Stationery Items: Mini notepads, pencils, erasers, and other stationery items can be great additions.
- Puzzle Pieces: Create a little puzzle by splitting a larger puzzle into different eggs. Kids can collect the pieces and then assemble the puzzle afterward.
- Coupons or IOUs: Create personalized I-owe-yous (IOU) or coupons for fun activities, like a movie night, a day at the park, or a special treat.
Why do we need vinegar to colour the eggs?
Vinegar is commonly used when colouring eggs because it serves several important purposes during the egg dyeing process:
Acidic Environment
Vinegar creates an acidic environment in the dye mixture. The acidity helps to break down the outer layer of the eggshell, called the cuticle or bloom. This allows the dye to penetrate the eggshell and bond with the eggshell's surface, resulting in more vibrant and long-lasting colours.
Better Colour Adhesion
The acidic environment created by vinegar helps the dye adhere better to the eggshell. Without vinegar, the dye might not stick as effectively, leading to pale or uneven colours.
Shiny Finish
When you use vinegar, it can give the dyed eggs a shiny finish, enhancing their overall appearance.
Remember that the longer the eggs stay in the dye, the more vinegar they will absorb, which can affect their taste if you plan to eat them later. If you intend to consume the dyed eggs, you should keep the dyeing time relatively short, or consider using separate eggs for decorating and eating.